Field Camp (YBRA) 2025

By Jack McLaughlin, M.S., Geology, Teaching Assistant

Field Camp Overview

Every summer UH geology undergrads, as well as some students from outside of U, flock to the Yellowstone Bighorn Research Association (YBRA) facility in Red Lodge, Montana to complete an intensive, 5-week field course called Field Camp, the required capstone project for geology majors. During Field Camp students primarily work on honing their ability to create geologic maps and cross sections based on collected field data and careful field observations. To do well, students must draw on all of the knowledge from the various classes they have taken up to this point. It is a fast-paced experience that leaves students with little time to relax. Throughout the 5 weeks students only get 3 days off.

Field Camp is split into two halves. The first takes place in Red Lodge, Montana at the historic YBRA facility and is taught by professors Alex Robinson and Tom Kalakay. Here, students live in shared cabin lodges on the side of Mount Maurice at the base of the Beartooth Mountains. The second half takes place in Dillon, Montana and is taught by professors Jennifer Lindline and John Weber. Students stay in dorms at the University of Montana Western. This year students also got to experience a visit to Yellowstone National Park and Craters of the Moon National Monument between the two halves.

Fanshawe Lodge, the main building at the YBRA facility where students eat breakfast, pack lunch for the field, and eat dinner. Photo credit: Jack McLaughlin, TA
A view from the back porch of Fanshawe Lodge that shows exposures of some of the stratigraphy students become familiar with over the course of Field Camp. Photo credit: Jack McLaughlin, TA

Gypsum Spring: 6/3/25 – 6/6/25

A marmot that was spotted on the way down from the YBRA facility on the way to the field. Traditionally, seeing a marmot on the way to the field is considered a good omen. The students named this one “Merlin.” Photo credit: Erin Olson, Student

This introductory exercise takes place at a field area called Gypsum Spring. Students are expected to turn in a complete geologic field map that marks the contacts between different rock formations and shows structural features such as faults and folds. Additionally, students are expected to produce a cross section of the area based on their field observations and strike and dip measurements taken using their Brunton compasses, as well as a legend that includes detailed of all geologic units they encounter in the field. Although some of the exercises are different in scope and content, this type of exercise is the most common in Field Camp.

For these mapping exercises, the first day is always the most crucial. During this day we traveled together in a large group as the first half Professors, Tom Kalakay and Alex Robinson, explained the different geological units and pointed out the, sometimes subtle, differences between them.

Students at their very first outcrop in Field Camp taking advice from Professor Tom Kalakay on refining their lithologic descriptions. Photo Credit: Jack McLaughlin, TA
Students taking measurements of an outcrop. Photo Credit: Jack McLaughlin, TA
Professor Tom Kalakay walks the students through a new unit. Photo Credit: Jack McLaughlin, TA
Student Princess Rodriguez takes a strike and dip measurement of an outcrop. She uses her map board as a flat surface to measure to account for the irregularity caused by ripple marks at the top of the unit. Photo Credit: Jack McLaughlin, TA

At the end of the first day, and for the rest of the exercise, students broke off into groups of 2, armed with radios for safety, to complete their deliverables.

Students in Wadsworth Study Hall working on their first project an hour before it’s due. Panic has begun to set in. Photo Credit: Jack McLaughlin, TA

Of course, in Field Camp, rest is not for the weary. Celebrations for turning in their first project are short because the next project starts the very next morning.

Beartooth Conglomerate: 6/7/25 – 6/8/25

The second project is one of the few non-mapping projects at field camp. In this case, students split off into pairs and measure the thickness of different sections of the Beartooth Conglomerate using Jacob staffs, describe the lithology, and identify stratigraphic features. The Beartooth conglomerate is a great example of growth strata that formed during uplift of the Beartooth Front. Growth strata are deposited during a mountain building event, making them syn-orogenic. Because deposition occurs during deformation, the strata get caught up in the deformation front, tilting them. The result is that the older strata dip at a higher angle (because they have been caught up in deformation for a longer time) and the younger strata dip more shallowly.

A pair of students begin their journey up to the Beartooth Conglomerate. Photo credit: Jack McLaughlin, TA
A fantastic view of Clark's Fork Canyon from approximately halfway up the Beartooth Conglomerate. This is the location of a future project. Photo credit: Jack McLaughlin, TA

Once all of the groups have finished evaluating their different sections, they gather together in the classroom back at the YBRA facility to present their findings and agree on an interpretation of the entire area.

Back in the classroom, students take turns going up to the board to write down their observations and interpretations. Photo credit: Jack McLaughlin, TA

Finally, they each write a scientific report that details their own data and observations along with how those observations fit in with the bigger picture of everyone’s data. Then, it’s off to the next project.

Nathaniel Brunello (left) and Philip Lira (right) play a quick game of horseshoe before dinner. Photo credit: Jack McLaughlin, TA

Grove Creek: 6/9/25 – 6/6/14/25

The Grove Creek mapping project was arguably the most involved project of the first half of field camp. Once the students became somewhat familiar with the structures in this part of the world and how they formed, they had to combine their knowledge, field observations, and other data that was provided to develop a more regional interpretation. Grove Creek is along the Beartooth Front and is an area that involves thick-skinned deformation wherein the Archean bedrock is involved in the deformation.

As with any mapping project, the first day is a walkthrough of the stratigraphy. In this case, the stratigraphic walkthrough of Grove Creek has been named the “death march” because of how physically strenuous it is.

Students set off on the Grove Creek “death march.” Photo credit: Jack McLaughlin, TA
A carbonate unit that has been turned on its side from regional tectonic forces. Photo credit: Jack McLaughlin, TA
Students prepare for the last leg of the death march. Photo credit: Jack McLaughlin, TA

This year, almost every student made it to the end of the death march.

The first group of students who finished the death march! Photo credit: Jack McLaughlin, TA

However, it was slightly more taxing for some than others.

Student Nathalie Devoir takes a rest after completing the death march. Photo credit: Jack McLaughlin, TA

In the middle of the Grove Creek project students got a much needed break from the sometimes grueling hiking to have a field trip day designed to help their regional understanding of the area. Students first formed five groups of 4/5 each and came up with group names. Traditionally, the group names are voted on to determine the winner (this year’s winner was Basalt and Battery!).

Next, the students (and instructors) all sketched Towne Point Mountain across from the YBRA facility on the other side of the Beartooth Highway. Based on their observations, students were asked to consider where, if any, a fault is and what type of fault it would be.

Students (and Professor Alex Robinson) sketch Towne Point Mountain. Photo credit: Jack McLaughlin, TA

Armed with their observations of Towne Point Mountain, students were then driven down the road to where a stratigraphic test well was drilled and tasked with creating a cross section that honors both the well data and their observations. Each team then took turns presenting their interpretation and fielding questions from the other groups.

One of the groups presents their interpretation of well data and their own observations. Photo credit: Jack McLaughlin, TA

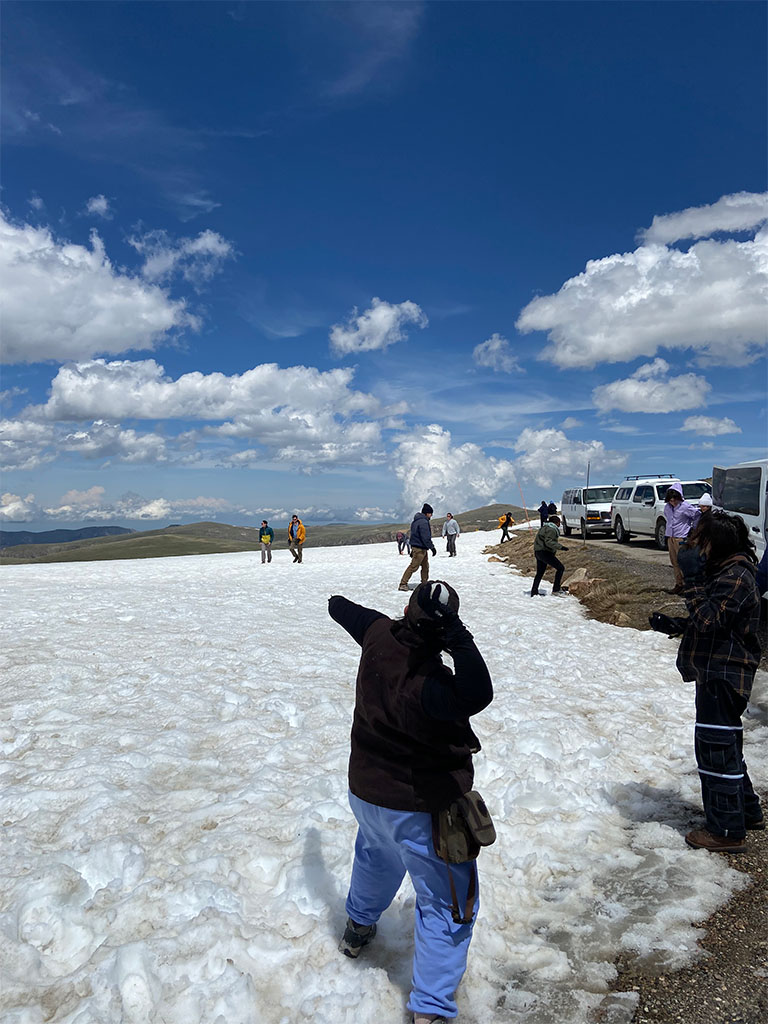
Next, we went to the Beartooth Pass, a scenic drive that goes over the Beartooth Mountains.

Even in June there was still snow on the Beartooth Pass. So of course we had to stop for a snowball fight. Photo credit: Jack McLaughlin, TA
More snowball fight tomfoolery. Photo credit: Jack McLaughlin, TA
Obligatory post snowball fight group photo in front of the elevation sign. Photo credit: Alex Robinson, Professor

The final stop was at a convenience store/inn called the Top of the World, which provides a great view of the Beartooth Butte Formation as well as much of the stratigraphy the students observed at Towne Point Mountain, albeit at a very different elevation and orientation. After a quick sketch, the students must come up with one final interpretation using this new observation.

Students observe the Beartooth Butte formation along with other familiar stratigraphy from Towne Point Mountain. Photo credit: Jack McLaughlin, TA
One of the groups give one last presentation. This time incorporating all of the knowledge they’ve gained throughout the day. Photo credit: Jack McLaughlin, TA

The next day we went back to Grove Creek for another day and a half of field work to finish maps and collect the necessary data to make complete cross-sections.

The roads in Grove Creek are notoriously difficult to drive on. Sometimes rerouting streams is necessary. Professors Tom Kalakay and Alex Robinson work under the helpful supervision of my fellow TA, Abe Masaryk. Photo credit: Jack McLaughlin, TA

Clark’s Fork Canyon: 6/16/25 – 6/17/25

The last project of the first half is another mapping project. However, this time it is a surficial mapping project, so students are only expected to consider surface features. Montana has been subjected to three distinct glacial events at 15-20 kya, 50 kya, and 100 kya. The effects of these can be seen in the u-shaped valleys carved from the movement of glaciers and the moraines, which are large accumulations of poorly sorted sediment that form when glaciers retreat. Another surficial feature the students needed to map are fluvial terraces. These are flat features that represent previous flood plains of fluvial systems. Multiple generations of fluvial terraces can be identified at Clark’s Fork Canyon. It was up to the students to puzzle out how many are present in this area.

Student Keren Padilla considers the geomorphological processes that have led to the terrain before her. Photo credit: Jack McLaughlin, TA
Students take a quick lunch break on top of a terminal moraine. Photo credit: Jack McLaughlin, TA

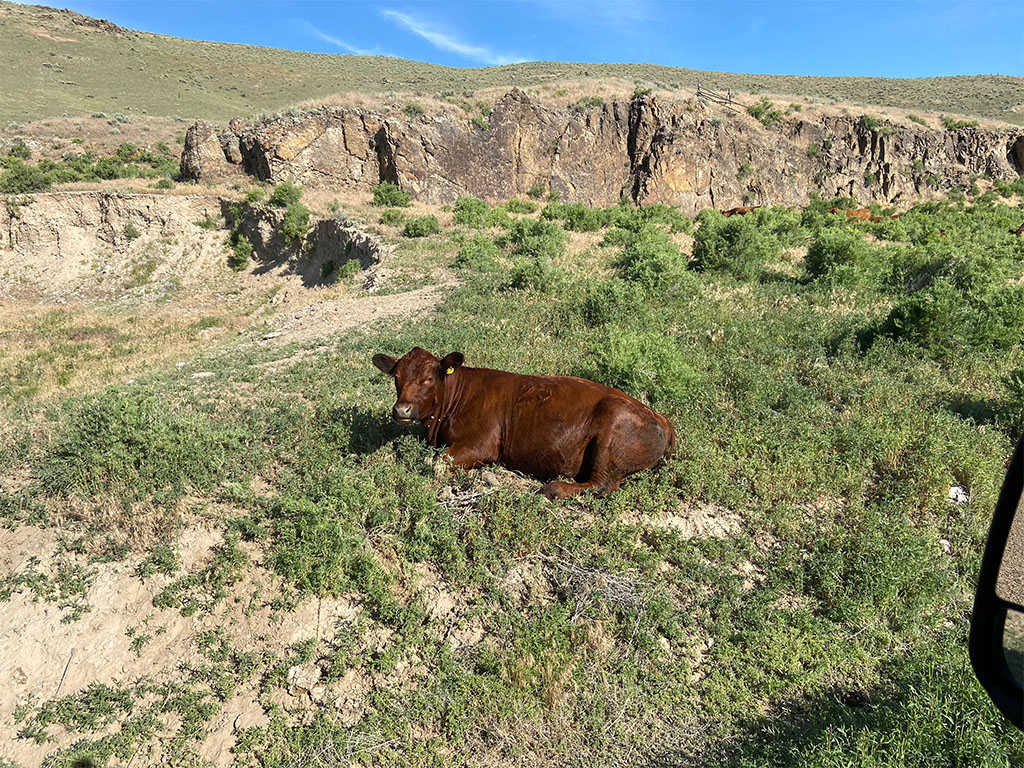
Back at camp it’s common to see wildlife, even very large wildlife, wander through camp.

A mother moose with her two babies taking a stroll through camp. Photo credit: Jack McLaughlin, TA

Stillwater Mine: 6/20/25

The second half, led by Dr. Jennifer Lindline and Dr. John Weber, starts with a visit to the Stillwater Mine before beginning the journey to Dillon, Montana. The Stillwater Mine is a layered mafic intrusion (LMI) that mainly produces palladium and platinum (although it also has a history of producing chromium).

Students ascend into the mining facility. Photo credit: Jack McLaughlin, TA
Kevin Butak, a resource geologist at Stillwater Mine and our host, plays a mandatory safety video all who visit the mine must watch. Photo credit: Jack McLaughlin, TA

After visiting the mine facility, we drove up the road to give students a chance to see rock types associated with an LMI and try to pin down the boundaries between different rock layers.

Old residential buildings. During its heyday in the 1940s, the Stillwater Mine was a place where entire families lived. Photo credit: Jack McLaughlin, TA
Students observe an anorthosite with pyroxene banding. Photo credit: Jack McLaughlin, TA

After the visit to Stillwater everyone has to pack up and get ready to leave in the morning to begin the drive to Dillon, Montana.

Traveling to Dillon, Montana: 6/21/25 – 6/23/25

Near the start of our long journey to Dillon. We took the Beartooth Highway one last time. Photo credit: Jack McLaughlin, TA

The next two days were hectic, but filled with beautiful sites and interesting geology. During the days we got to experience Yellowstone National Park and Craters of the Moon National Monument and at night we camped at KOAs.

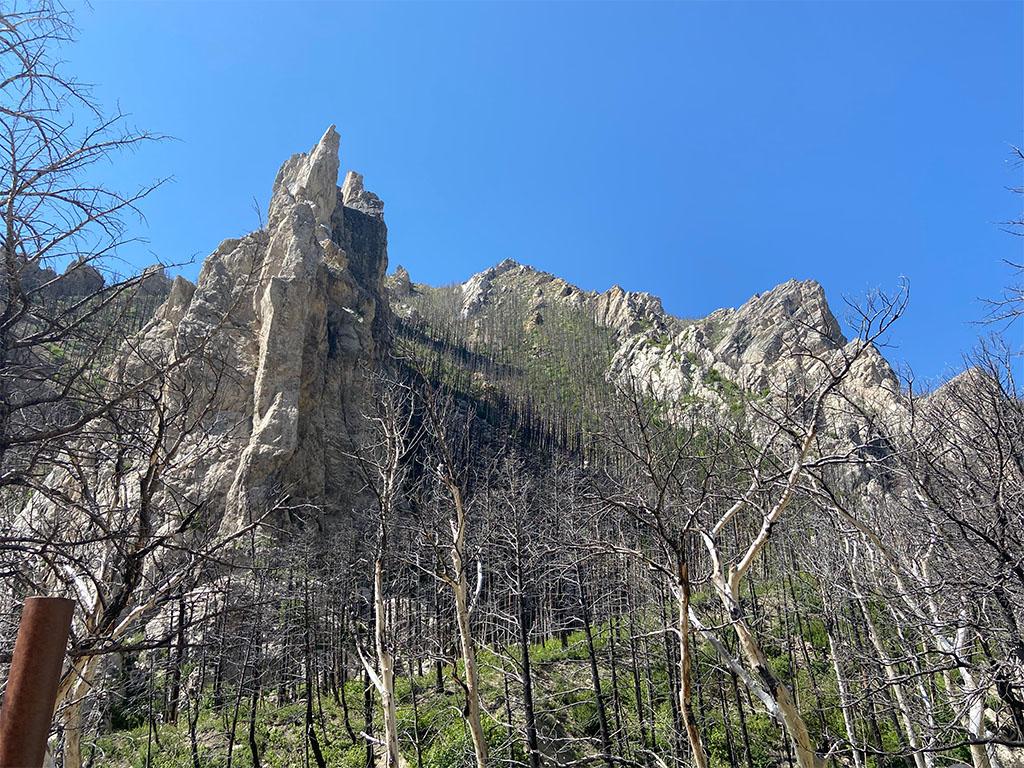
Our first stop in Yellowstone National Park was a hike up to Specimen Ridge, a great example of a lahar (a type of debris flow associated with volcanic activity that includes pyroclastic material, rock debris, and water). In this case the lahar destroyed, buried, and preserved an ancient forest, the evidence of which can be seen all around Specimen Ridge.

Professor Jennifer Lindline standing next to a petrified tree stump. Photo credit: Jack McLaughlin, TA
TA Abe Masaryk ponders the beauty of the natural world from the top of Specimen Ridge. Photo credit: Jack McLaughlin, TA
One of many petrified tree stumps on Specimen Ridge. Brunton compass for scale. Photo credit: Jack McLaughlin, TA

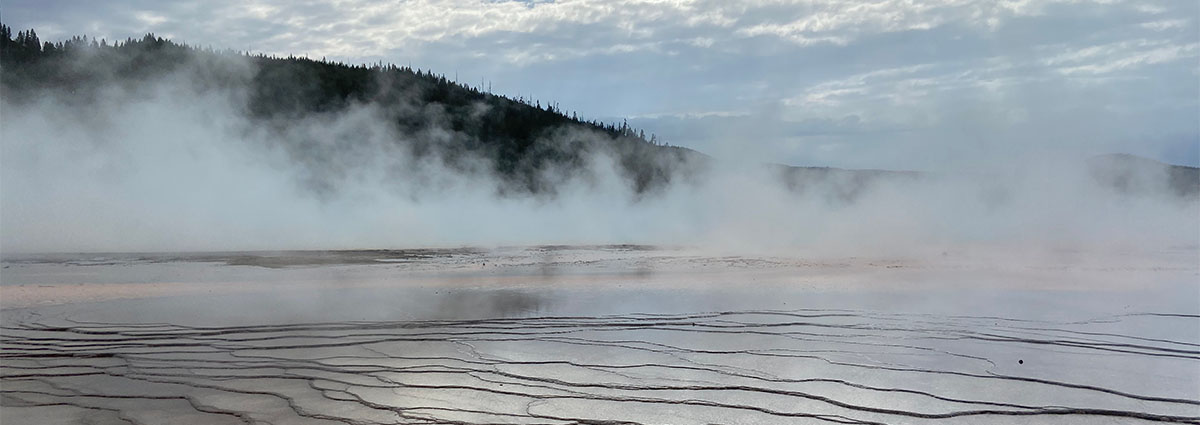
The next stop we made was the Grand Prismatic, the largest hot spring in the United States.

A view of the Grand Prismatic hot spring. Photo credit: Jack McLaughlin, TA

Finally, no trip to Yellowstone can be complete without getting to see Old Faithful.

Old Faithful right at the moment of eruption. Photo credit: Jack McLaughlin, TA

After camping the night at a KOA near Yellowstone, we set off in the morning to go to Craters of the Moon National Monument in Idaho, an area that has been heavily affected by volcanic activity.

A typical view at Craters of the Moon of the otherworldly landscape caused by basaltic lava flows. Photo credit: Jack McLaughlin, TA
Students got the opportunity to walk through an empty lava tube. Photo credit: Jack McLaughlin, TA
Multiple cinder cones can be seen in the background. Photo credit: Jack McLaughlin, TA

After Craters of the Moon we finally arrived at Dillon, Montana and settled in at the University of Montana Western before starting the second half of Field Camp in earnest.

The University of Montana Western campus. Photo credit: Jack McLaughlin, TA

Block Mountain: 6/24/25 – 6/26/25

A view of Block Mountain from within the field area. Fortunately, the students are not required to climb it. Photo credit: Jack McLaughlin, TA

Block Mountain is a popular location for Field Camp around the United States and thus it is a place where many students earn their geologic field mapping stripes. Unlike the thick-skinned deformation of Grove Creek from the first half, Block Mountain is an example of thin-skinned deformation that doesn’t involve the Archean basement rocks. This makes it a notoriously difficult area to map due to the highly complex contact relationships between units caused by faults.

Students at the first outcrop at Block Mountain taking measurements and writing down lithologic descriptions. Photo credit: Jack McLaughlin, TA
TA Abe Masaryk (left) and student Robert Leenhouts (right) showing the apparent offset of an outcrop due to a small-scale fault. Photo credit: Jack McLaughlin, TA
Small-scale folding a came across while trying to track down students to help. Photo credit: Jack McLaughlin, TA
Block Mountain is surrounded by rancher land, so it's common to come across cows on the way to and from the field area. Photo credit: Jack McLaughlin, TA

Timber Hill: 6/27/25

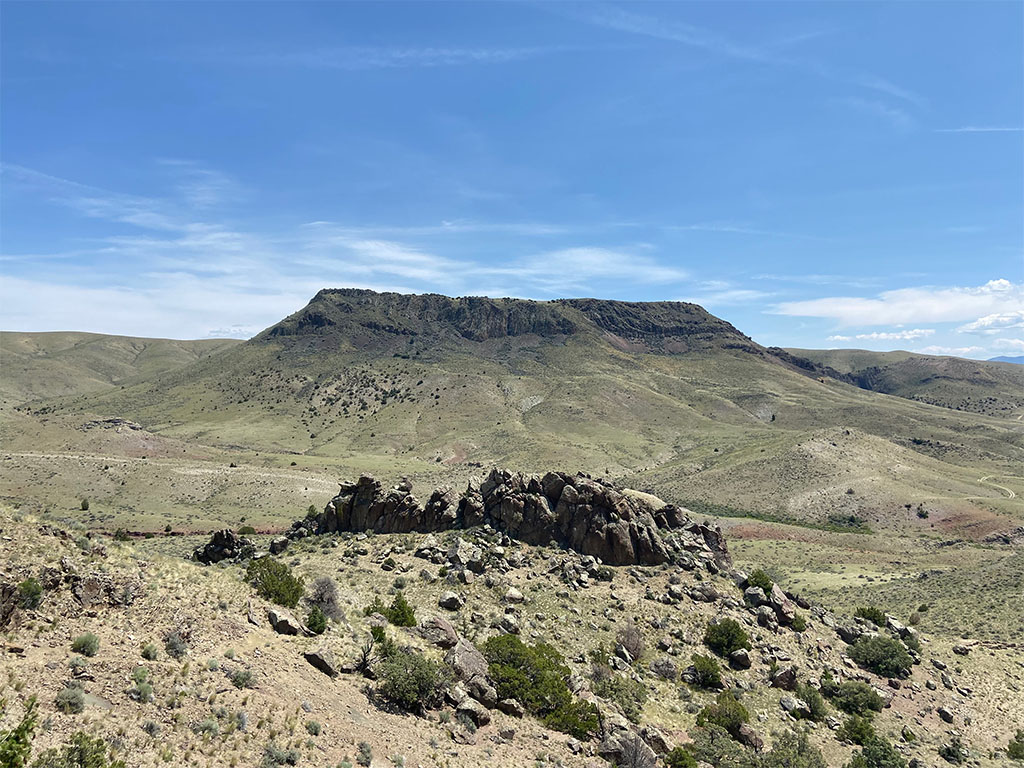
The primary geologic feature of Timber Hill is a basaltic mesa that is a great example of inverse topography. Approximately 6 million years ago a volcanic eruption likely associated with the Yellowstone hotspot caused lava to flow down a paleo-valley and crystallize into a thick layer of basalt. Due to being more resistant than the underlying sedimentary layers, this basalt acted as a shield against erosion that would eventually become a high point in the topography.

This was a one-day mapping project intended to test the students’ ability to finish both a geologic map and cross-section with a short period of time.

The large basaltic mesa that is characteristic of Timber Hill can be seen in the background. Photo credit: Jack McLaughlin, TA
Students taking a quick lunch break and taking in the view after being cut loose for the day. Photo credit: Jack McLaughlin, TA

While students were busy finishing their maps and cross-sections, I had a chance to sneak off by myself to hunt for garnet sand that can be found along the banks of the primary stream that cuts through the field area.

The red minerals are all fragments of garnet. Brunton for scale. Photo credit: Jack McLaughlin, TA

Kelley Reservoir: 6/28/25

Similar to the Timber Hill project, this was a one-day mapping project. However, this was also a solo exercise wherein students could not speak with each other for the duration. This is as close as Field Camp gets to having an exam.

Kelley Reservoir. Close to where the students were dropped off to begin their project. Photo credit: Jack McLaughlin, TA

Chute Canyon Project: 6/30/25 – 7/4/25

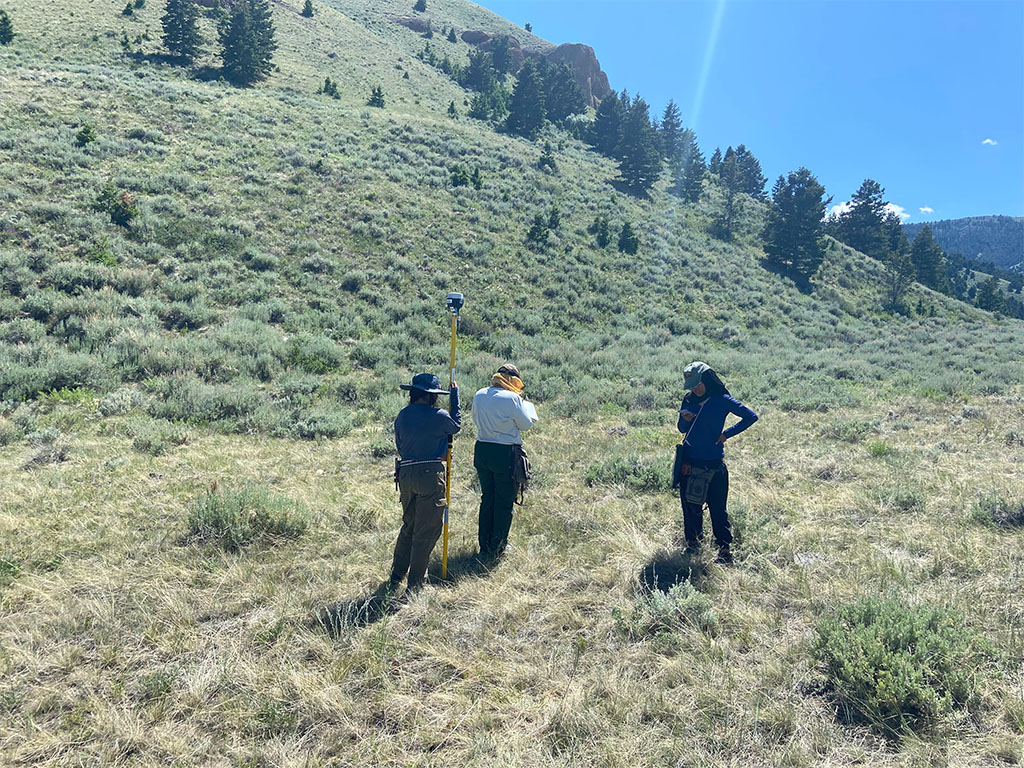
The final project of Field Camp was a neotectonic evaluation of the Red Rock Fault located in an area called Chute Canyon. Students were expected to use a wide variety of data to figure out the geometry, kinematics, and rupture history of the Red Rock Fault. Additionally, because it is an active fault that could rupture in the near future, they conducted a hazard and risk assessment. The data students used included continuous GPS velocity data, differential GPS real time kinematic data taken using GPS equipment in the field, soil profiles from pits dug by the students, and, of course, field observations. For this project, students split up into 7 groups of 3 each and all groups presented their results in front of the class at the end.

Students using GPS equipment to make a fault scarp profile. Photo credit: Jack McLaughlin, TA
Students working on their soil pit. Photo credit: Jack McLaughlin, TA
Students proudly show the largest rock they unearthed from their soil pit (I had to help them haul it out). Photo credit: Jack McLaughlin, TA
A group picture on the last day in the field for UH's 2025 Field Camp. Photo credit: John Weber, Professor

After wrapping up field work, students had one last day to work on their projects in the classroom before presentations on the 4th of July.

Student Madeline Tompson accidentally left her phone on a ridge during the solo mapping exercise at Kelley Reservoir. So, I drove her back during the morning of the last classroom day, and we searched for it. Right before giving up we found it! Photo credit: Jack McLaughlin, TA
One of the student groups giving their final presentation. Photo credit: Jack McLaughlin, TA

After all of the student groups finished their final presentations, we gathered outside to celebrate Field Camp being finished with a cookout!

Professor John Weber donning the mantle of grill master to prepare a variety of meats. Photo credit: Jack McLaughlin, TA

After finishing up in Dillon we all packed up to make the trip back to Red Lodge. The students stayed one last night at the YBRA facility before leaving the next day to finally go home.

Closing Thoughts

 Field Camp is important because it provides experiences that can’t be replicated in a classroom. It teaches students how to hone observational and interpretive skills, which are critical to becoming geologists with good scientific judgment. It also helps students learn to work independently and as part of a team in a way that prepares them for graduate studies or professional careers. I am fortunate that I was able to experience it twice, once as a student and again as a teaching assistant.

I hope that I can return someday in the future. But, until then, so long, Montana.

A picture of the Erling Dorf dorm and surrounding landscape taken on my final night at the YBRA facility. Photo credit: Jack McLaughlin, TA